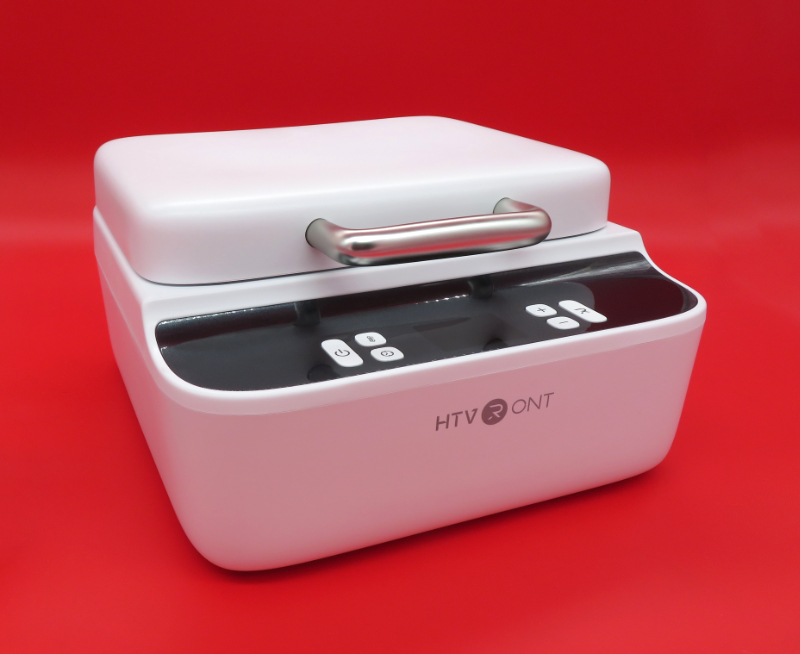
REVIEW – If you’ve read my previous reviews, you’ll know that I’ve been experimenting with dye sublimation on my old Epson RX595 printer for a bit under two years now. My overview of sublimation in my EufyMake E1 UV Printer review caught the attention of Chinese hobbyist brand HTVRONT. They offered to give me a path into the wild world of vacuum sublimation with a brand-new consumer-oriented machine called the H17.
︎ Jump to summary (pros/cons)
Price: $279.99
Where to buy: HTVRONT
What is it?
The H17 is a compact vacuum sublimation machine. Wait, what?
Sublimation uses molecular magic to bond polymer dyes to polymer substrates, so the transferred image is bright and very durable. Vacuum sublimation is an even more advanced method of sublimation which makes use of vacuum pressure to wrap a printed image around a 3D object. This is how most gadget shells and cases are made beautiful, as are other curved (both concave and convex) objects which can tolerate vacuum pressure. Vacuum sublimation is great for things like smartphone cases, because the plastic film can stretch and form around an object (within reasonable limits).
Much like how a pressure cooker changes the chemistry of cooking, vacuum sublimation changes the chemistry of sublimation. Most importantly, it operates at a lower temperature – 285F rather than the 360F minimum typically required for proper sublimation. This means vacuum sublimation well-suited for ceramic products like coasters, mugs, and pet bowls.
Until the H17, at-home vacuum sublimation was mostly the realm of the commercial manufacturing world, because there just wasn’t any hardware geared toward the consumer market. HTVRONT hopes to change this with the H17.
What’s included?
The basic kit contains everything you need to get started, including three 60mm (2.3″) pin-on buttons for making a project right out of the box.
- H17 unit
- Aluminum vacuum plate
- Badge fixture set
- Universal phone fixture (Android or iPhone)
- Tweezers
- Large heat-resistant gloves
- Heat-resistant tape
- (5) A4 sublimation film sheets
- (3) 60mm (2.3″) sublimation badges
Design and features
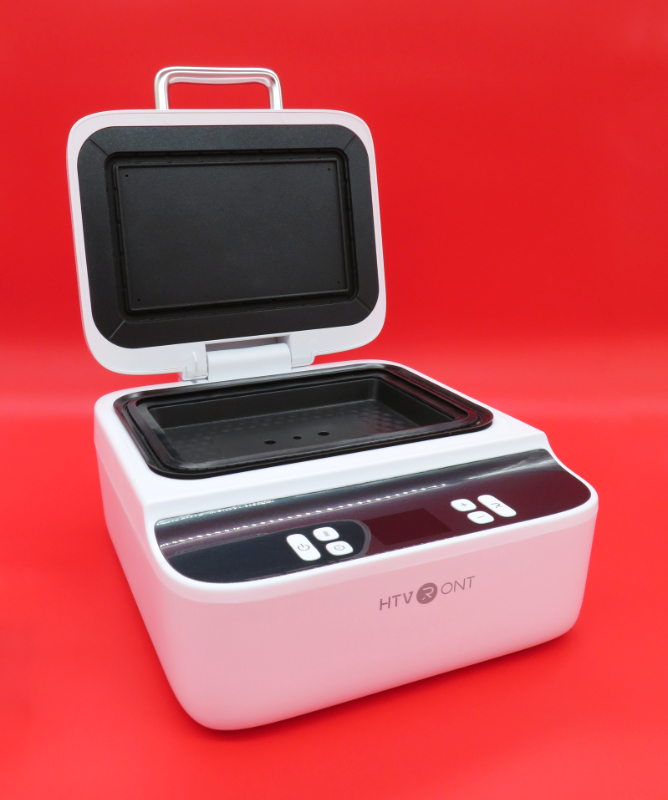
Available in white, baby blue, and lavender, the H17 has a relatively small footprint at only about 12″ square. You’ll want some clearance around the machine for airflow and heat dissipation, and you shouldn’t put anything over the machine (including a cabinet).
I was sent a white H17, and it picked up a surface mark almost immediately. I haven’t taken a melamine eraser to this mark yet, but it should be pretty easy to remove from the textured plastic surface.
This isn’t a “smart” device at all, so all controls are available on the machine’s top, in front of the top half of the chamber. The controls are pretty simple, but HTVRONT’s documentation was disappointingly lacking, so I’ll go over everything here.

From left to right and top to bottom:
- Power: click once to power on and off. No press-and-hold required!
- Blinking white: H17 is plugged in, but powered off.
- Solid white: H17 is powered on.
- Temperature: this button will be solid red when not actively setting the temp. Click once to change between setting the upper and lower platen temps – the temperature portion of the digital display will flash while in this mode. Press-and-hold to swap the display between C and F.
- Solid orange: set upper platen temperature.
- Solid red: set lower platen temperature.
- Time: this button will be solid red when not actively setting the temp. Click once to change between setting the preheat and sublimation times – the time portion of the digital display will flash while in this mode. Time is set and displayed in seconds.
- Solid orange: set preheat time.
- Solid red: set sublimation time.
- Up and down: these buttons make it very easy to adjust the time and temperature. Press-and-hold to add/subtract from the original value more efficiently. These buttons do not illuminate.
- Start: click once to start or cancel the vacuum sublimation process.
- Blinking red: H17 is preheating.
- Solid green: H17 is preheated and ready to go.
The rest of the machine is the vacuum chamber, which is coated in Teflon (PTFE). There are four air holes in the corners of the top half, and three much larger holes in the center of the bottom half of the chamber. The center of these three is the airflow hole, used to pull all air from the vacuum chamber during sublimation. The other two are for holding HTVRONT’s universal phone fixtures (more on those below).
When sublimating anything that isn’t a phone case, the included aluminum plate drops into the bottom of the chamber. This plate has a small notch on one side. You can insert something into this notch to pry out the plate, but don’t use anything metal, since that would risk damaging the Teflon lining. I usually use a Menda nylon probe tool, colloquially known as a “black stick.”
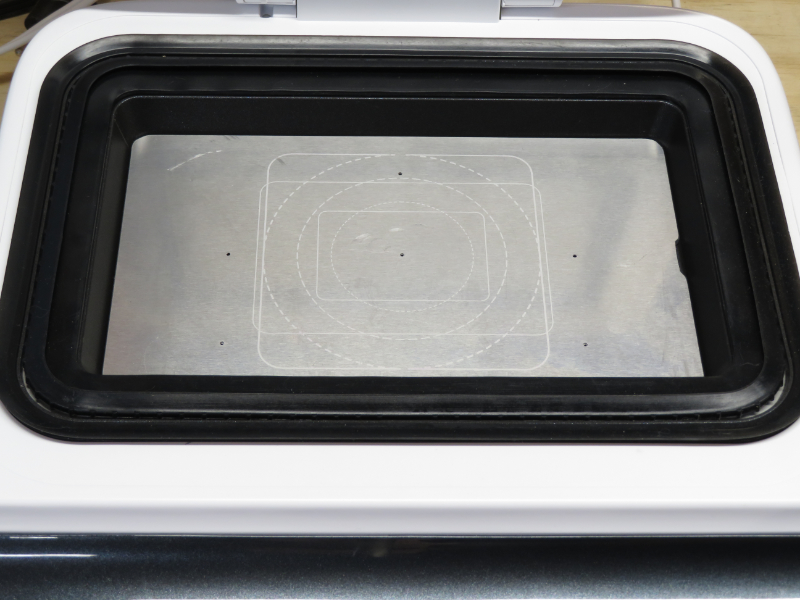
This plate has some standard shapes engraved on it for easy alignment. I think I may end up making a lot of car coasters, so I will probably use our CNC to make a custom engraved plate for quick alignment of three coasters at once.
The underside of the plate reveals countersunk openings around the air holes.
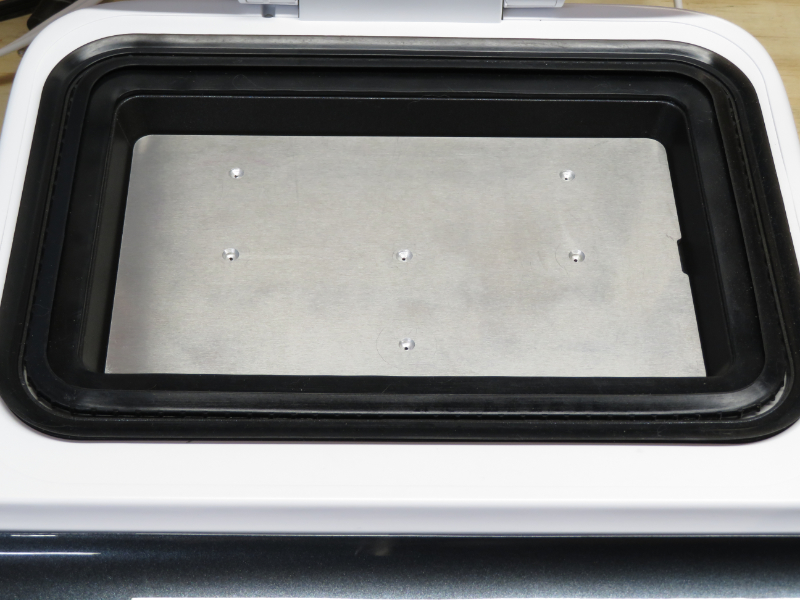
These are engineered to hold the included badge fixtures, perfectly aligning three buttons in the chamber.
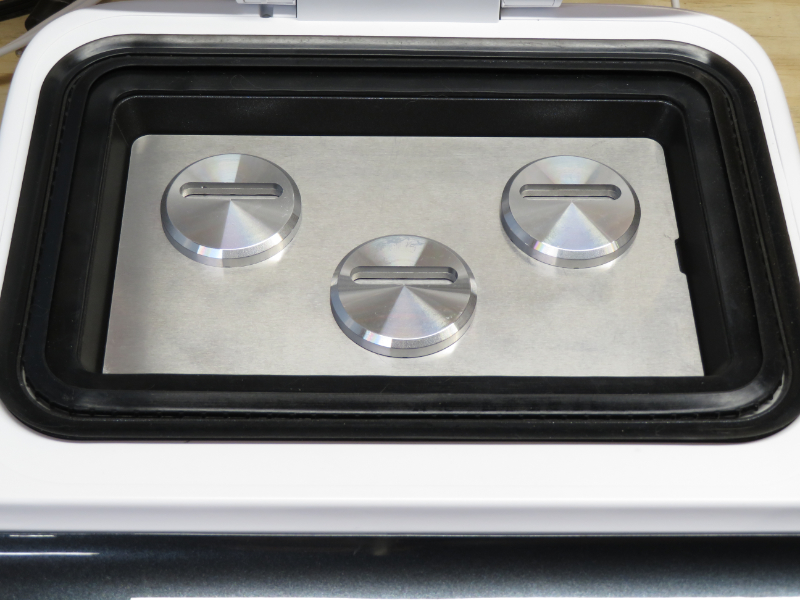
Since buttons, unlike coasters, have a specific orientation, this fixture makes it very easy to drop in three buttons for sublimation. That said, buttons were the least enjoyable item to produce with this machine, so you might think twice about using this equipment for making batches of buttons (more on that below).
The H17 features an integrated power cord. This is a good thing; both the heating element and the vacuum pump on this little machine are high-load components, and the safety label on the underside of the machine indicates it will pull up to 1400W. Make sure to use your H17 either directly on an outlet or on a high-load power strip – never put high-load devices on a surge protector!
Universal phone fixtures
For evaluation purposes, HTVRONT sent me two universal fixtures: iPhone and Android. The H17 is available with one of the two fixtures, or you can spend a bit more to get both fixtures with the device.
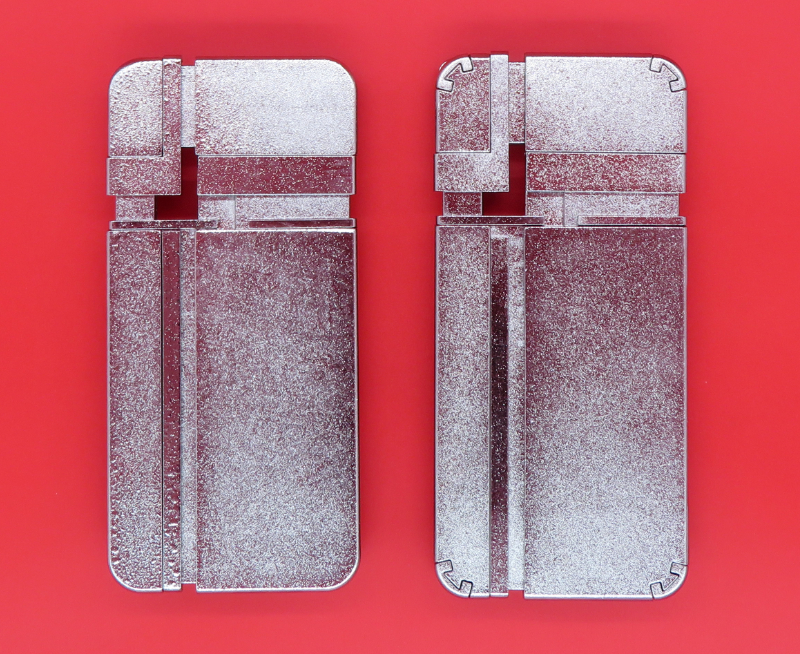
These fixtures have two posts on the underside which drop into holes in the H17. This makes print alignment very easy, especially given the nature of vacuum sublimation as it deforms the film around your target item.
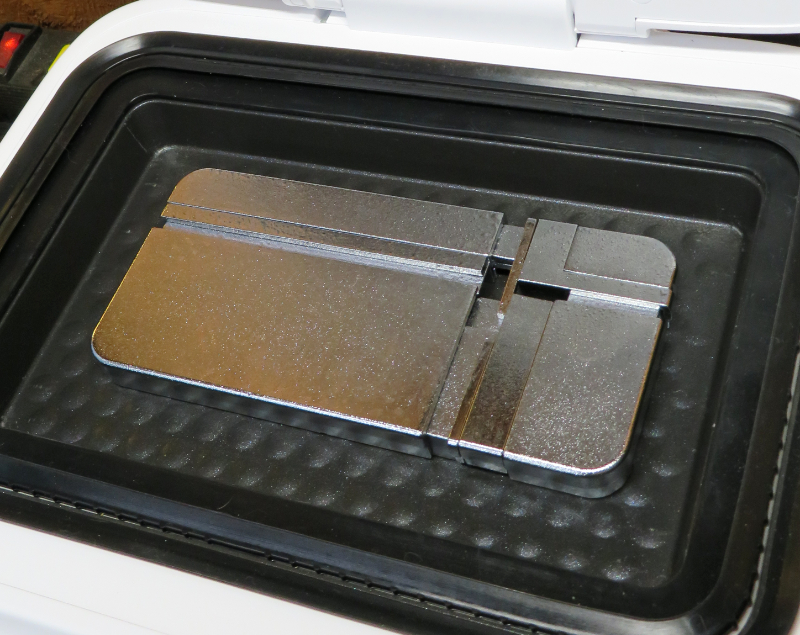
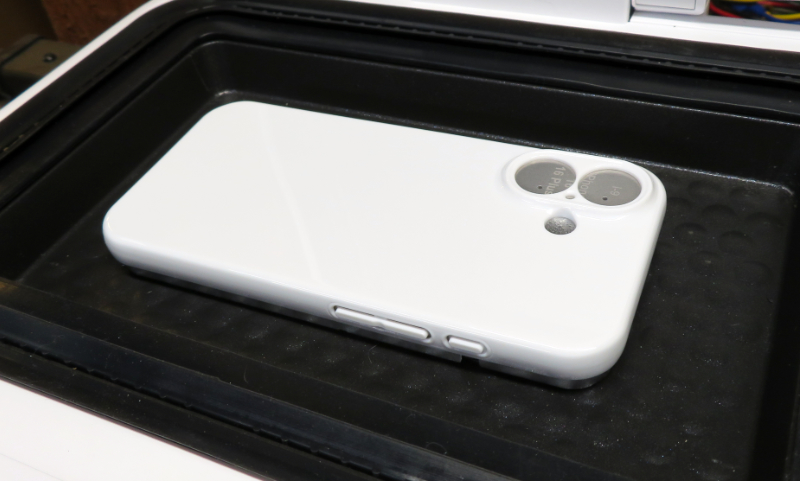
These fixtures are important, since the vacuum pressure of the active machine would break an empty phone case. This is why each universal fixture kit includes a series of metal blanks, which are designed to inserted into any voids molded into a case blank for the rear camera array.
You need to use these blanks with appropriate cases, but they aren’t necessary for cases with an open rectangle exposing the rear camera(s).
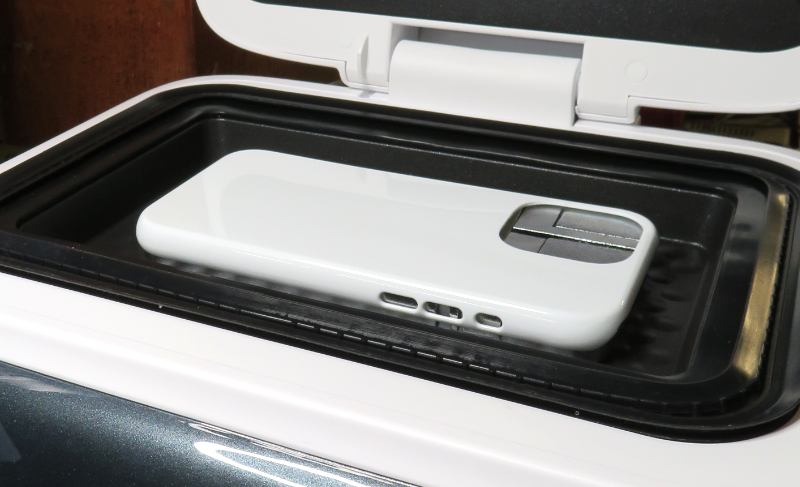
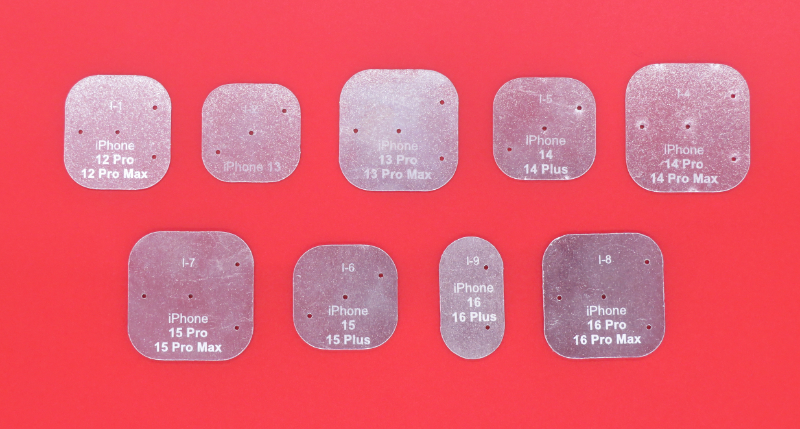
The iPhone kit contains blanks for every iPhone, iPhone Plus, iPhone Pro, and iPhone Pro Max, generations 12 through 16. The fixture does not support the iPhone Mini.
The Android kit contains blanks for several popular Chinese smartphone brands (Huawei, Xiaomi, and Redmi) and one Samsung phone model (Galaxy A71).
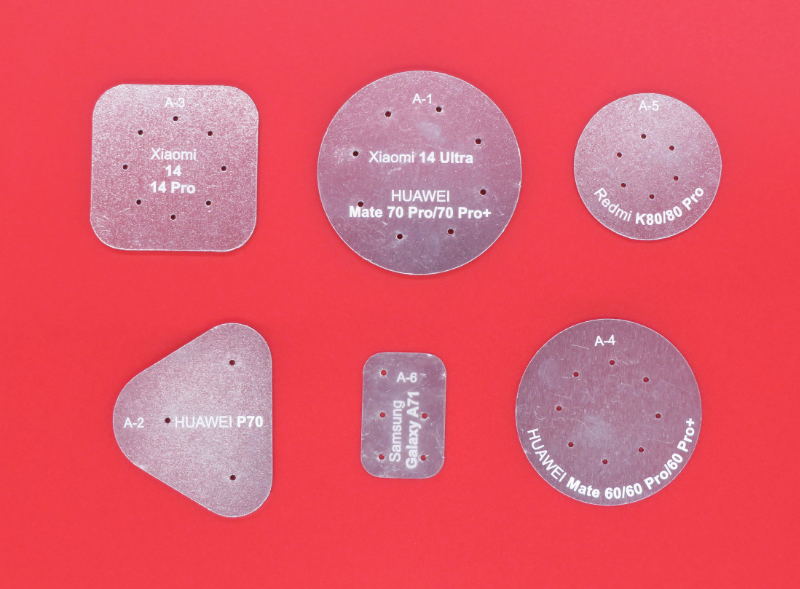
If you need other blanks, you can search on sites like AliExpress and Alibaba, or you can make your own from the correct gauge aluminum using a CNC – you just need to ensure you include air holes where the metal is exposed around the camera openings, so the film fully forms to the case properly.
Each of the two universal phone fixtures is a spring-loaded rectangle, along with several bits which can be used to adjust the total size of the phone blank. I closely compared the two universal fixture kits, and these metal bits do appear to be identical between the two, even though the numbers engraved on the underside are not.
The Android fixture also includes three sets of different corner shapes, while the iPhone fixture uses a fixed rounded corner. These different corners ensure the case isn’t damaged during the vacuum sublimation process.
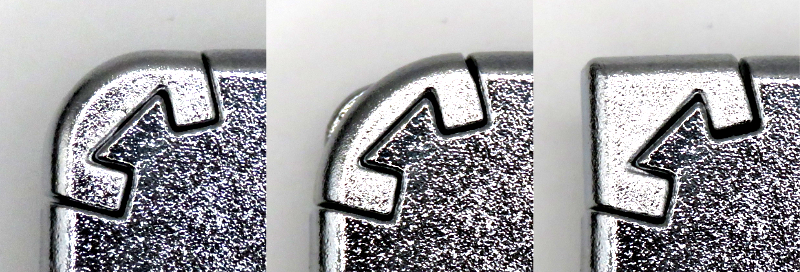
HTVRONT has a really good system going with these universal fixtures. In browsing AliExpress for blanks and other consumables, I noticed other vacuum sublimation machines use freely moving metal blocks as the blanks for different phones. This makes alignment more of a challenge, especially if you’re doing several items in a row.
HTVRONT’s design makes object and print alignment very easy, and the fact that each of the two fixtures supports a wide variety of phones means you don’t need to spend a lot of money on fixtures, which adds up fast if you want to make products for more than a small handful of phone models.
I was able to fit all the accessories for both universal phone fixtures, along with the button fixtures, in a plastic organizer box. This makes it really easy to find what I need when I need it.
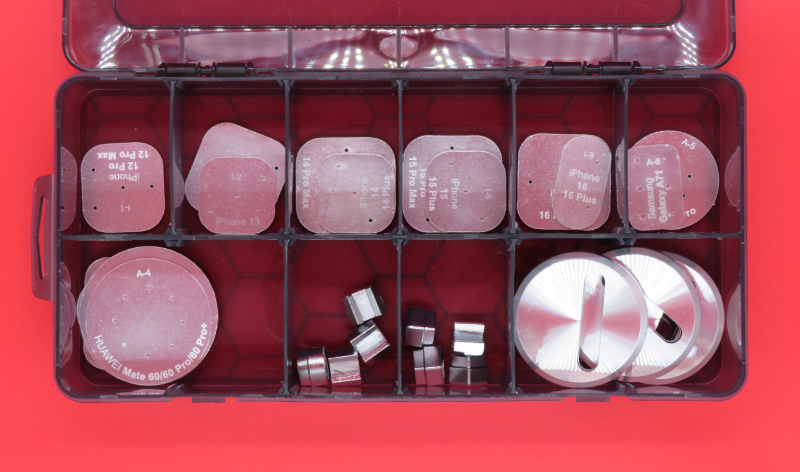
This is another big advantage over standard fixtures – individual block fixtures for each phone model take up a lot more space compared to these two universal fixture sets.
You can still use regular vacuum sublimation machine blanks, too! Just ensure the airflow cavity on the underside of the blank is centered over the hole in the middle of the HTX01. This really opens up the capabilities of this machine, since you aren’t just limited to the fixtures manufactured by HTVRONT.
I do have one complaint about these fixtures – they appear to made from some sort of alloy and finished with a cheap chrome plating, which is already bubbling from repeated exposure to heat and pressure. The fixture retails for about $50, and at this price point, I think it should be made from plain aluminum, instead.
Additional materials
HTVRONT sent me some sublimation blanks. I also already have a collection of materials, so I also used some of my existing stock for this review.
- (5) iPhone 16 cases
- (5) Samsung Galaxy A71 cases
- (2) Round 50mm (1.96″) MDF keychains
- (2) Square 100mm (3.94″) PU coasters
- (2) Round 74mm (2.0″) ceramic ornaments
The coasters and keychains are basic flat materials, which means they can be used with a normal heat press. While the ceramic ornaments can be pressed with a heat press, they work much better with vacuum sublimation.
The phone cases are designed for vacuum sublimation. While it’s probably possible to use a heat press with a phone case (assuming you can reinforce the cavity inside the empty case!), it’s not advised, and you might not get very good results.
Making projects with the H17
Standard sublimation uses special paper as the transfer medium – the image is printed in reverse on this special paper, which then release the ink during the sublimation process. Paper doesn’t conform to shapes nearly as well as plastic, though, and sublimating with paper on something that isn’t a uniform shape (like a cylindrical tumbler or mug) is often an exercise in lots of frustration.
The plastic printable sublimation film used with the H17 is rather difficult to find, which I think is mostly because nobody but HTVRONT makes a consumer vacuum machine like this…yet. I was sent links to a couple products on Alibaba and found a listing on AliExpress; across all options the pricing comes out to about eighty cents a sheet. The film also has a limited lifespan – I’m not sure how long it’ll last, but it ships vacuum sealed in a heavy-duty mylar bag, suggesting it’s vulnerable to passive damage from light, moisture, and oxygen.
The good news is, the products you can make with this machine are a level above what can be done with a standard heat press and sublimation oven, and the price per sheet for the film isn’t at all unreasonable when you’re selling what you make. It just means user errors are a bit more expensive (ask me how I know).
The basic process is similar, but not identical, to standard sublimation. Like with most sublimation projects, your image is printed in reverse on the matte side of the included sublimation film. For today’s project, I’ll be using some artwork from Wombo.
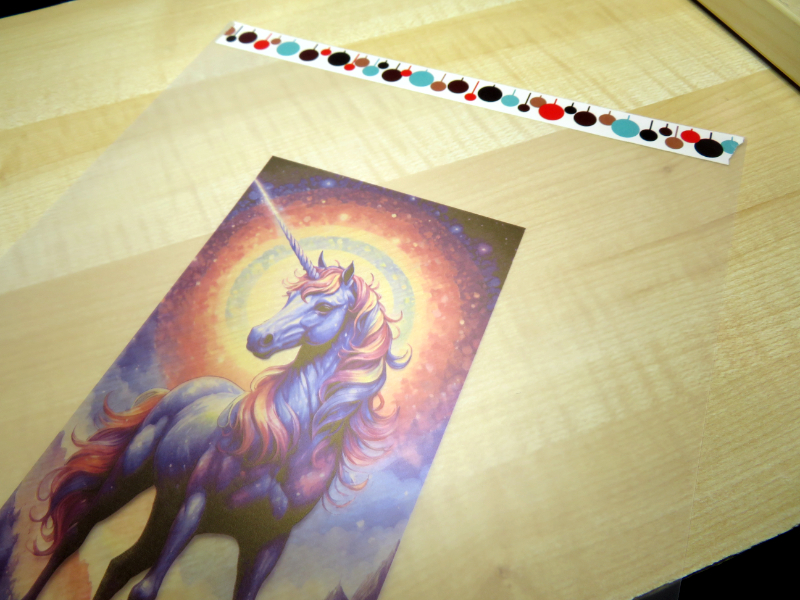
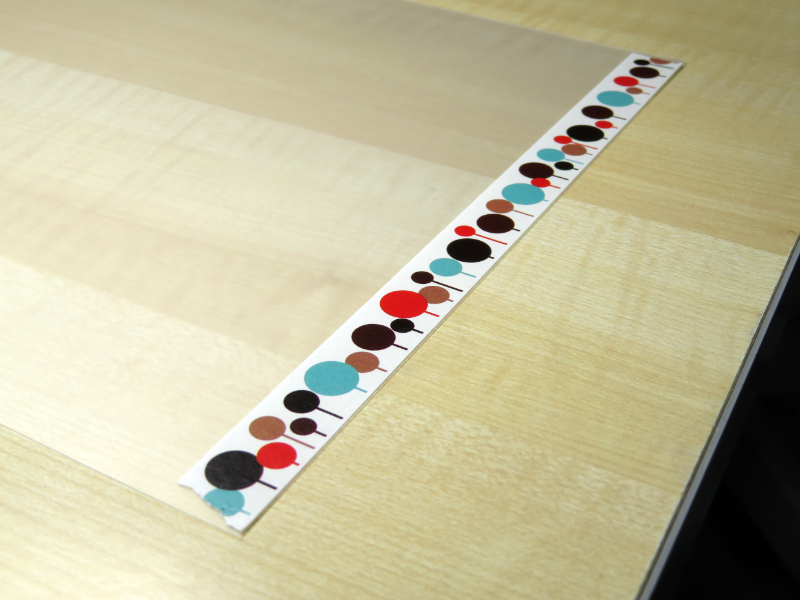
I had numerous problems with the printable film and my Epson RX595 until I tried putting a strip of heavyweight washi tape along the bottom edge of the film. Since discovering this little trick, I’ve had no problems getting the film to feed properly through my printer. HTVRONT includes some small paper labels you can put on the bottom corners of the film, but this was inadequate for my printer, so if you have trouble, try washi tape! I’ve had varying levels of success with different types of washi tape, and in my experiments, thinner tape needed to be wrapped around the edges of the film, and really thin tape didn’t help at all.
While your project prints, turn on the machine and make sure the settings are correct. The machine does remember your previous settings, and so far, I haven’t had to make any changes to the time or temperature across different substrates, including plastic, ceramic, and MDF. Per the instructions I was sent by HTVRONT, I’ve been using 285F for 5 seconds preheat and 330 seconds sublimation.
You’ll want to put your blanks into the machine before it preheats, because 280F is quite hot and will easily burn you! It’s safe to leave any sublimation blank in the closed machine as it heats up.
Once your project is printed, place the film, print side up, atop the machine. The heat from the machine will help soften the plastic, which makes it more amenable to a tight vacuum seal against your substrate. Let the film preheat for five minutes, then flip it over, open the machine, and place the film over the open bottom half of the chamber.
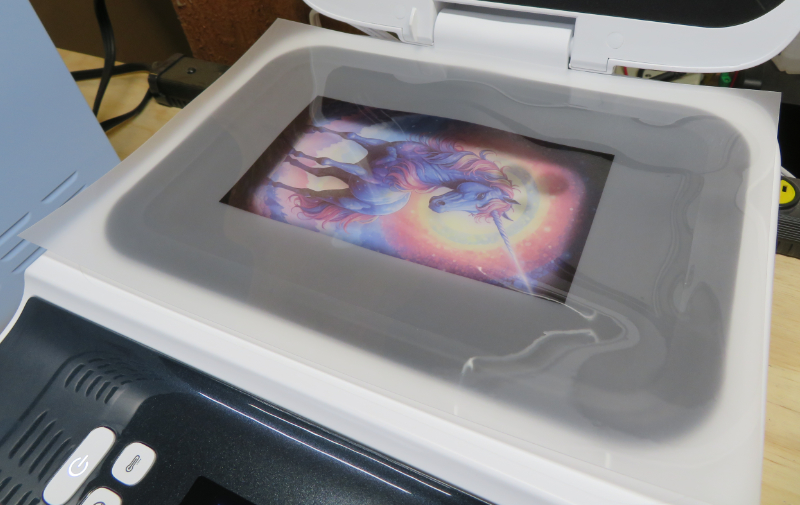
Visually check to make sure everything lines up well enough, close the machine, and press the start button. The machine will spin up the vacuum pump as it sublimates. It sounds about as loud as a home espresso machine, if not a bit quieter.
Once the process is complete and the timer runs down, the machine will beep several times to let you know it’s done. Open it up to reveal the consumed film, which is now formed over your object
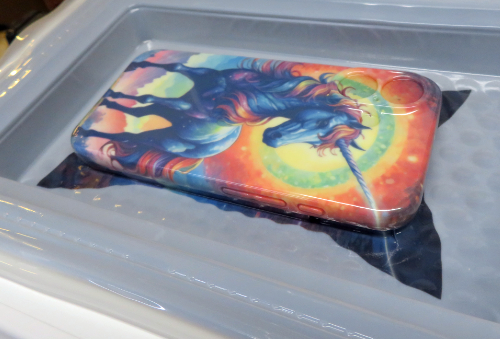
Remove the film, and presto – your beautiful sublimated product is complete!
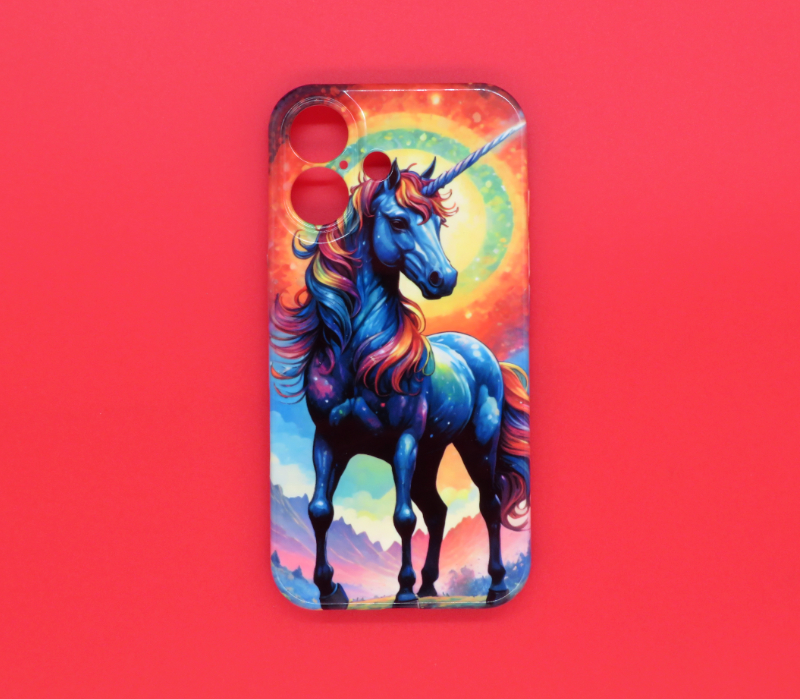
As mentioned earlier, I had a terrible time extracting completed pins from the vacuum molded plastic film. It might help if the machine forced air into the chamber after sublimation is complete, to help release the film from substrates like pins.
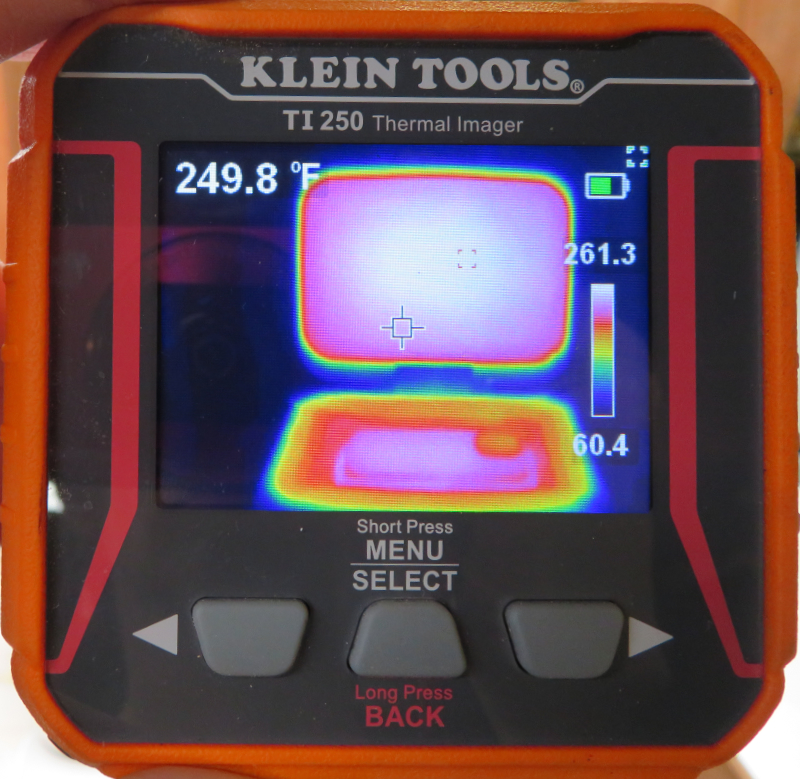
One important safety note: the interior of the chamber remains very hot for awhile. It’s basically like a fully enclosed baking pan. Leave the machine open after use so the heat can quickly dissipate, and don’t touch it until it’s fully cooled!
Designing your projects
HTVRONT recommends using their software, LOKLiK IdeaStudio, but I found it to be a very limited application, especially since I use different printer color profiling for different substrates. Since the H17 isn’t a computer-controlled device, you don’t need to use HTVRONT’s software much at all.
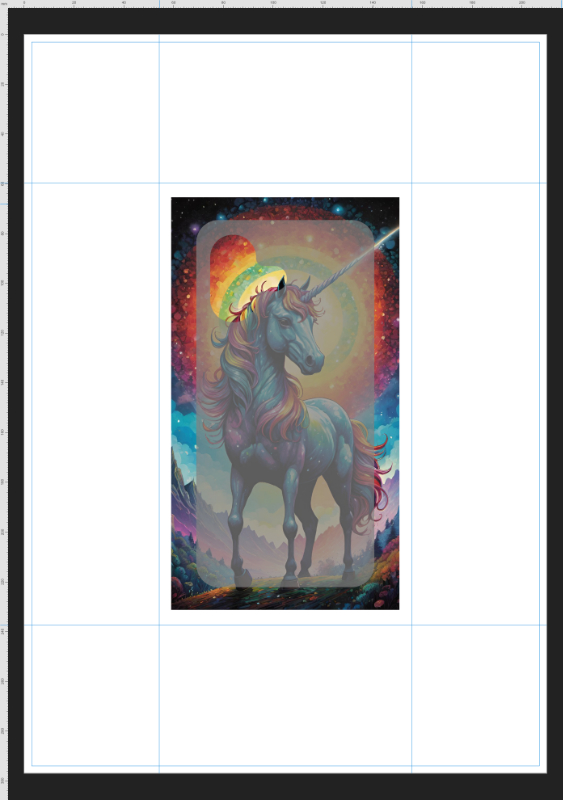
Instead, you can start with a screenshot from the software and then use any graphic design or layout application to do your design work. I prefer to do all my work in Affinity Publisher.
The included aluminum vacuum plate does have some layout guides screenprinted on it, but they’re not useful at all if you want to do multiple items per run. I would prefer this plate have a millimeter grid printed on it, which would make alignment significantly less tedious. I do a lot of extra measurements and double-checking of my measurements before proceeding with designing a project, and for double-sided products like ornaments, there’s an extra headache, because I need to make sure the reverse side is aligned.
If you just want to make phone cases for the most part, you only need a rectangle of the appropriate size centered on an A4 page. Since the phone fixtures drop into the post holes in the chamber, they’re always centered for perfect results every time.
I really would like to see HTVRONT just release downloadable template files for various phone cases and flat substrates. These could be SVG or EPS files for maximum portability. I don’t like the software and have no need for it at all, outside of getting the initial template guide for different phone cases.
Advantages and disavantages of vacuum sublimation
Vacuum sublimation is not a panacea for all your sublimation needs. It doesn’t work with soft, compressible substrates like neoprene, and plastic substrates with a lot of negative space need to be reinforced with an aluminum fixture custom molded to that negative space.
It seems to prevent MDF coasters from curving while cooling, but it also keeps the MDF under heat a lot longer, and the MDF still smells awful when the chamber is opened after sublimating.
MDF is also a semi-disposable substrate, so I don’t think this machine is great for products made with this material, such as keychains and coasters. The individual single-use film sheets are too expensive for a product which might not sell for more than a few dollars.
The film wraps tightly around the object you’re sublimating, which means you might have to pry the film off with some considerable effort. It was a real struggle to get a completed set of pins removed from the consumed film, and I’m not sure the tedium is worth the effort, given the low price point customers tend to expect for such a product.
Aside from the obvious curb appeal of full-wrap phone case designs, vacuum sublimation is great for flat ceramic substrates (mostly coasters). I have been trying to dial in the settings of my heat press with various coasters, and it’s been very frustrating and tedious. Vacuum sublimation lacks the common problems of sublimating ceramic with a heat press.
Ceramic is also durable, so it’s easier to include the cost of the film in the final retail cost of your products. I’m really happy with all my results and am swearing a lot less, so I think I will probably use this machine for making more coasters and small tiles.
I will probably continue using my heat press for producing textile coasters (including rigid ones) and pressing MDF. If these are your to primary product lines, the H17 might not meet your needs.
If you want to produce on-demand custom products like phone cases, ceramic coasters, and ceramic ornaments, the H17 is the first consumer hobby device that can make these things with truly professional results.
Final Thoughts
The HTVRONT H17 vacuum sublimation machine is definitely worth consideration if you’re an at-home sublimation hobbyist. It works with regular sublimation ink, and you can work with a variety of substrates and blanks without issues. My biggest complaints can be addressed with better accessories and downloads (like template files). The film is still going to be pretty expensive, at nearly eighty cents per sheet if you buy in bulk (and several dollars per sheet if you buy five-packs from HTVRONT at the advertised MSRP of $16.99!), but the price will come down as third party suppliers start offering competitively-priced film packs on Amazon (and elsewhere). The H17 is a bit expensive, but not prohibitively so, and the products you can make with it will offset the expense pretty rapidly. I’m really happy with mine and will definitely continue using it to create more beautiful products!
What I like about the HTVRONT H17
- Produces professional results easily and consistently
- Unique in the hobby sublimation scene
- Excellent for sublimating ceramic
- Small footprint and quiet mechanical parts
What needs to be improved?
- Software is unnecessary – template files would be better
- Film is expensive and hard to find (for now)
- Vacuum plate should be printed with a grid rather than different substrate shapes
- Fixtures should be plain aluminum rather than a chromed alloy
Price: $279.99
Where to buy: HTVRONT
Source: The sample for this review was provided by HTVRONT. HTVRONT did not have a final say on the review and did not preview the review before it was published.


